
Happy New Year!
I ate too much chocolate this Christmas. It’s a fact. This January, therefore, I shall be walking lots and lots. There is nothing better when you come in from the cold outside than a great big cup of steaming hot coffee.
Now that many coffee shops will charge you less for your coffee if you provide your own reusable cup, I reckon we can cut down on paper waste even more by making our own fabric sleeves too! So much prettier than the cardboard version and environmentally friendly too. You will need a sewing machine to make this but it is super simple so is a rewarding project for an experienced sewist, but at the same time very satisfying for a beginner sewist too.

You will need:
- Some pretty fabric for the outside and inside of the sleeve
- Wadding, fleece, batting or fusing to give the sleeve some padding
- Cardboard coffee sleeve to use as a template
- Pen, paper and paper scissors
- Fabric scissors
- Pins
- Button
- Elastic hair tie
- Needle and thread
- Point turner or something similar like a knitting needle or chopstick
Before you start you need to make sure that the cardboard coffee sleeve that you have picked up to use as a template fits the cup that you are making it for.
This is a perfect fit. You will then need to peel open the cardboard sleeve and lay it on some paper and draw around it to make a template. I drew around mine and also added a 1/4″ seam allowance all the way around. Just to mention that this sleeve had no overlap so I knew that my finished fabric sleeve would meet edge to edge. I prefer this as there is no bulky lump of fabric where it overlaps a little, but if you prefer an overlap go ahead and simply add a little more length when you are cutting out. You can now cut around the line you have drawn using paper scissors.
Now that we have a template we can cut out our fabrics and wadding. Make sure your fabrics are pressed and free from any creases. I pinned and cut out two matching pieces of pretty cotton fabric for the outside and inside of the sleeve. If you prefer you could use a different fabric for the inside piece, making it reversible. As I was using a directional print I was careful to place the template so that it was not upside down! It is also important to flip over the template when you are cutting your second piece so that it is exactly opposite to the first one. I also pinned and cut one piece of wadding from this template.
Time to make a fabric sandwich! Place the wadding on the bottom, then place both pieces of pretty fabric on top of that – the pretty fabrics need to be placed right sides together. Pin this in place. 
Before we sew this together we need to insert the button loop (hair tie). Measure how large the loop needs to be by slipping it around the button and either sew a few stitches in it to keep it in place or wrap a thread around it a few times and tie it off. You need to do this or the hair tie won’t stay closed when you are sewing it together and it will look untidy. 
In my case, the smaller loop will be the loop which goes around the button. Remove a pin or two from one end of the fabrics which you just pinned together and insert the hair tie with the loop that is needed to go around the button inside the two layers of pretty fabrics. In my case the larger loop that is not needed will be sticking out. Also remember that the stitches where you have kept the hair tie closed together need to lie along the line of your seam allowance. As I am using a 1/4″ seam allowance I was careful to place the threads of my hand stitching on the hair tie 1/4″ in from the edge of the fabric.
Re-pin this edge closed again and we are ready to take it to the machine. In order that we can turn it right side out again when we have finished sewing around the edges I will leave a gap of approx 2″ along the bottom edge of the sleeve. 
Simply sew around the edges (leaving a 2″ gap along the bottom edge) using your chosen seam allowance (in my case 1/4″). Back stitch a few stitches at the start and finish so that your seam doesn’t pull open when you are turning it right side out. Stitch slowly when going over the hair tie. You may also like to backstitch over this area for extra strength. Snip all 4 corner points to make it less bulky – don’t clip too close to your stitches though! You can also trim back the hair elastic (not shown on this picture) so that you aren’t left with this bulk inside your sleeve.
Turn the sleeve right side out now. Use your point turner, knitting needle,chopstick or similar to push into the corners to make the points sharp. Take to the ironing board and give it a good press ensuring the raw edges of the opening are turned neatly inside.
Again take to the sewing machine and neatly sew a line of stitching 1/4″ all the way around all four edges. This should catch in the opening that you had at the bottom so that the sleeve is totally enclosed now. If you have quilting skills now is the time to show them and go ahead and make those fancy free motion patterns that I so admire. I, however, do not possess such skills and therefore chose to sew a couple of neat horizontal lines following the curves of the long edges. At this point you will want to give your sleeve another good press.
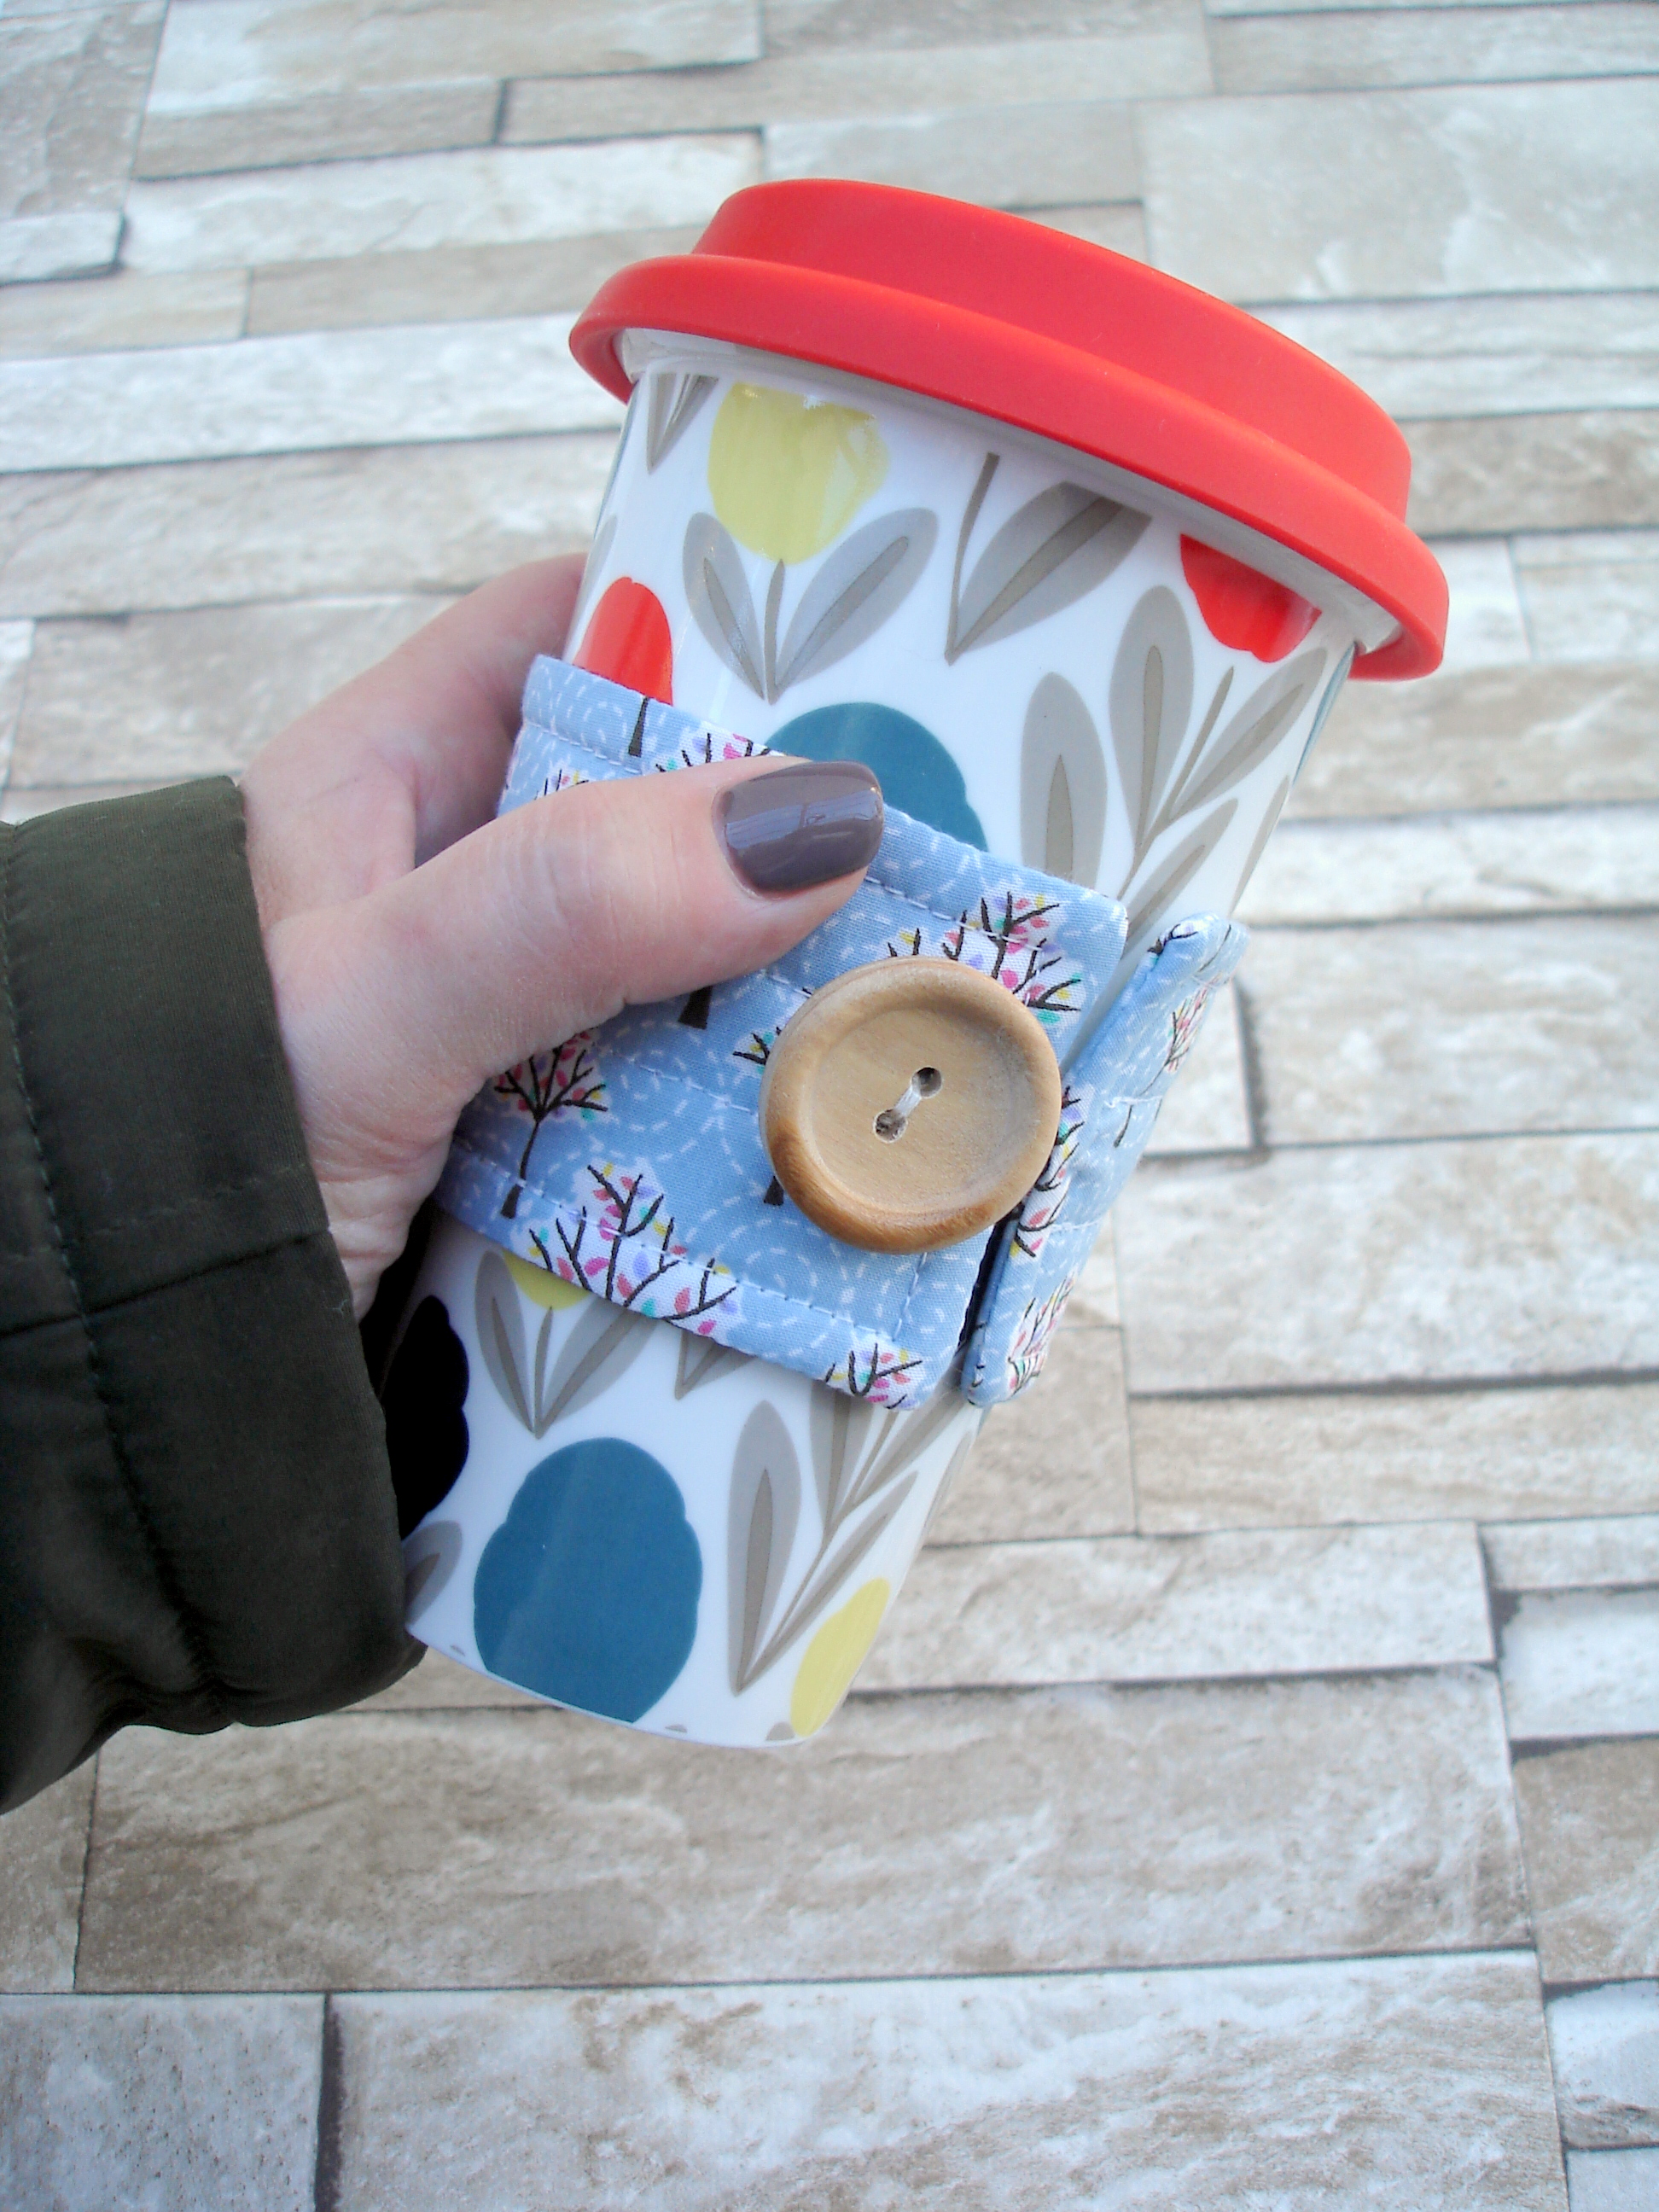
Place the sleeve around the cup and work out where you need your button placement to be. Hand stitch this in place. That’s it, you’re done! So easy and so so quick.


Do you have a ‘coffeeholic’ in your life that you could make this for? Or would you treat yourself to this? It is a great unisex gift idea – you could really personalise your gift with fabric relevant to the recipient, maybe it could be a little extra present to give along with a coffee gift card?
If you were wondering, the coffee cup here is from http://www.lauraashley.com (a couple of years back), and the pretty fabric used was from a fat quarter bundle purchased from http://www.hobbycraft.co.uk a couple of months ago.
I do hope you have enjoyed this quick tutorial. As always I would love to hear if you have made one of these.
Wishing you all a very happy new year, stay warm and enjoy your coffee!
Take care, I’ll be back soon,
Kathy x
0 Comments for “Fabric Coffee Cup Cozy Sleeve Tutorial”